Prune for Structure, Not Just Shape
Where to make the cut, when to stop, and why your shrubs keep going leggy.
Pre-flight briefing
Read this before you make the first cut
Overview
Transform your approach to woody plant care. Learn to evaluate branching angles, prioritize the '3Ds,' utilize the 3-cut method on heavy limbs, and make cuts that work with the tree's natural healing collar rather than leaving stubs that invite rot.
Estimated time
1–3 Hours (Depending on tree/shrub size and count).
Add roughly 25 percent for a first attempt and a yard with awkward access.
Contractor pro-tip
Never coat pruning wounds with synthetic sealants or 'tree paint.' Scientific research shows these trap moisture against raw wood, promoting internal decay. Instead, make precise cuts that allow the plant's natural defense systems (the branch collar) to compartmentalize and seal the wound.
Tools checklist
- Bypass hand pruners (for stems up to 3/4" diameter)
- Bypass loppers with 24"–30" handles (for branches up to 1-1/2")
- Arborist hand folding saw with tri-edge teeth (for limbs 1-1/2" to 4")
- Safety glasses / impact-resistant specs
- 70% isopropyl alcohol spray bottle (tool sanitation between trees)
Materials checklist
- Heavy leather or Kevlar-reinforced work gloves
- Flagging tape for pre-marking target branches before making cuts
- Clean water and lint-free rag for wiping blade saps and debris
Safety first — applies to the whole build
- Verify overhead safety: never prune branches within 10 feet of utility lines—contact a certified utility arborist.
- Never utilize 'anvil' style pruners, which crush living plant tissue; only use 'bypass' action shears that slice cleanly.
- Sanitize blades with 70% isopropyl alcohol between different plants to avoid vectoring blights and vascular diseases.
The build
Step by step
6 steps · 1–3 Hours (Depending on tree/shrub size and count).
- 1
Pre-Pruning Assessment and the 3-D Sweep
Step 1Step back 10 to 15 feet to observe the natural architecture of the tree or shrub from all four compass points. Before addressing shape or structure, systematically eliminate the "3Ds": Dead, Damaged, and Diseased wood. Use clean bypass hand pruners or loppers to remove dead stems back to healthy, living tissue or to the parent branch collar. Sterilize cutting blades with 70% isopropyl alcohol after every cut through diseased tissue to prevent cross-inoculation across the plant canopy.
The costly mistake
Rushing immediately into shape and canopy thinning before clearing dead or diseased wood. Dead wood alters canopy light penetration; clearing the 3Ds first often reveals that the tree needs far fewer structural thinning cuts than originally assumed.
- 2
Inspecting Crotch Angles and Competing Central Leaders
Step 2Identify competing vertical stems (co-dominant leaders) vying for central dominance. Inspect branch attachment angles: aim for strong, wide "U-shaped" attachments (45 to 60 degrees) that build thick supportive wood saddles. Flag narrow, acute "V-shaped" crotch angles that pinch bark inward between the trunks (included bark). Subordinate or remove one competing leader to establish a single dominant terminal trunk that resists storm and ice splitting.
The costly mistake
Ignoring narrow V-crotches with included bark on young trees. As both stems gain girth over five to ten years, they push against each other with zero cellular wood connection, creating an inevitable cleavage fault that shears open during heavy wind or wet snow loads.
- 3
Canopy Thinning: Crossing, Inward-Facing, and Rubbing Limbs
Step 3Trace the branch structure from the exterior canopy back toward the center. Look for branches growing inward toward the trunk rather than outward, water sprouts (vigorous vertical shoots growing from old wood), suckers emerging from rootstock, and branches that rub against or cross over one another. Remove the weaker or more poorly oriented of any two rubbing branches right at its origin. Thin the interior canopy to improve air circulation and sunlight penetration.
The costly mistake
Lions-tailing (stripping all interior foliage and leaves while leaving tufts of growth only at the tips of long limbs). Lions-tailing shifts physical wind-load leverage entirely to branch ends, increasing limb breakage risks and sun-scalding interior bark.
- 4
Locating the Branch Bark Ridge and Branch Collar
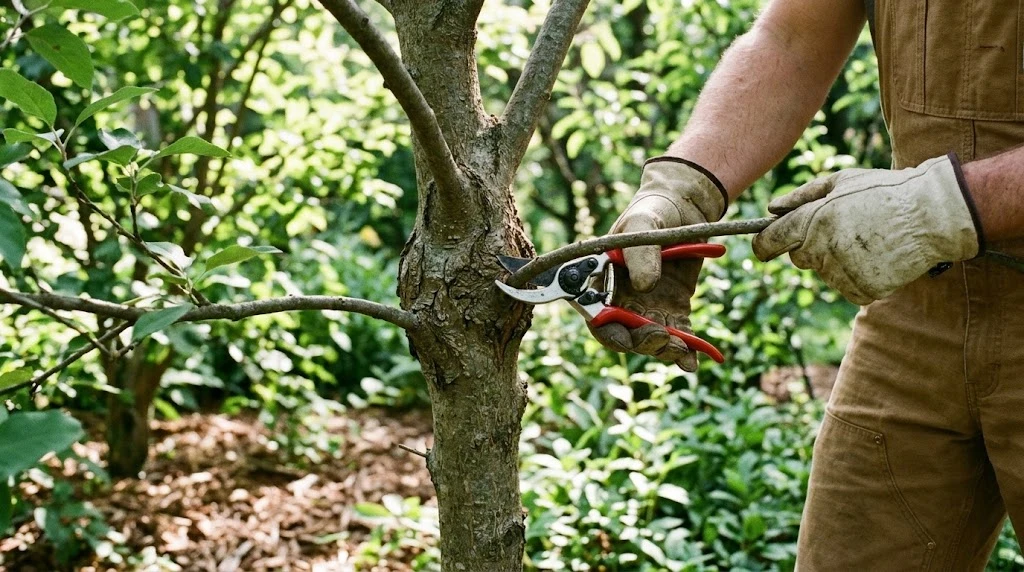
Step 4Before making any cut back to a trunk or parent limb, locate the two critical anatomical landmarks: the Branch Bark Ridge (a raised strip of rough, dark bark running along the upper branch crotch) and the Branch Collar (the swollen, wrinkled ring of parent trunk wood cradling the underside of the limb). Your final cut must sit immediately outside both features. The branch collar contains specialized chemical boundary cells that naturally seal and compartmentalize the wound.
The costly mistake
Making a flush cut flat against the tree trunk. Cutting into or shaving off the branch collar destroys the tree's natural defensive chemical barrier, opening an unsealable doorway for trunk heartwood decay organisms and boring insects.
- 5
Executing the 3-Cut Method on Heavy Limbs
Step 5Never cut a heavy branch (over 1.5 inches in diameter) in a single downward pass. Execute the professional 3-Cut Method: Cut 1 (Undercut): Make a shallow upward notch on the underside of the limb 12 inches away from the trunk, cutting 1/3 of the way through. Cut 2 (Relief Cut): Cut from the top down, 2 to 3 inches farther out along the branch; the weight of the branch will snap it cleanly between the cuts. Cut 3 (Finish Cut): Support the remaining lightweight stub and make a clean, downward cut immediately outside the branch bark ridge and branch collar.
Safety alert
Critical Bark Tearing Warning: Attempting to lop or saw off a heavy branch with a single top-down pass causes the limb to peel down under its own weight before the saw finishes, stripping a ragged sheet of bark down the trunk and permanently disfiguring the tree.
- 6
Respecting the 25% Rule and Post-Pruning Cleanup
Step 6Step back periodically to assess balance. Never remove more than 25% of a healthy tree's living canopy foliage in a single growing season (reduce to 10–15% on mature specimens). Removing excessive live foliage starves roots of photosynthesized carbohydrates and triggers dense bursts of weak, upright water sprouts. Gather all pruned trimmings, rake up diseased leaves for disposal, and wipe saw and pruner blades clean with camellia oil or light machine oil.
The costly mistake
Applying synthetic pruning sealer, tar, or aerosol tree paint over cut surfaces. Tree sealants trap internal moisture against raw wood, inhibit natural callus cell formation, and accelerate bacterial and fungal heart rot.
Contractor Referral Network
Decided this build is more than you want to tackle?
Structural pruning is mostly judgement: reading branch angles, finding the collar, and knowing when to stop. Work near utility lines, or a tree that is already leaning or split, belongs with a certified arborist — get free, no-obligation estimates from insured local crews.
Free estimates • Zero obligation
Tools & hardware
Need additional equipment?
Explore our complete inventory of commercial mowers, trimmers, compactors, and hauling rigs.