
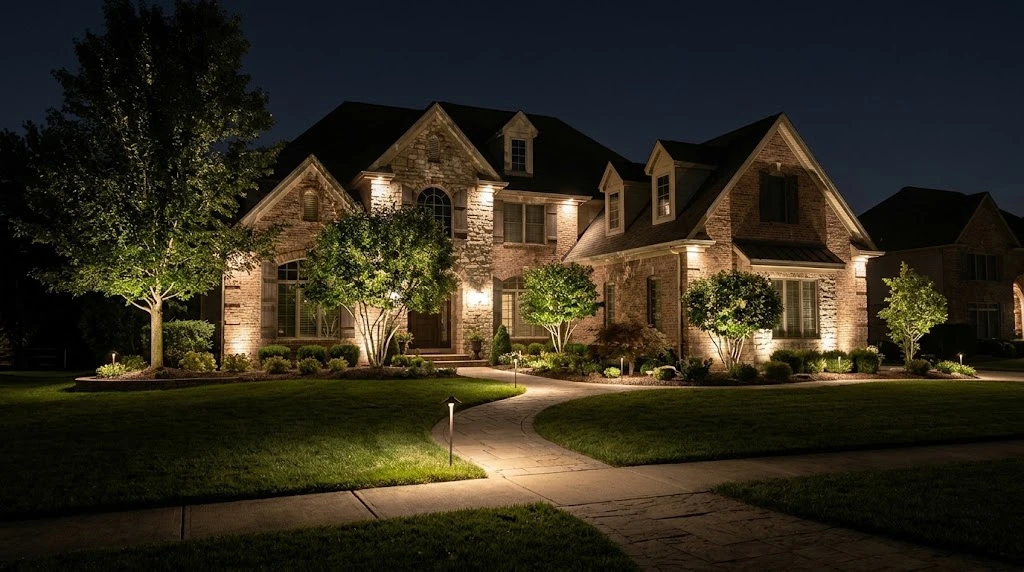
Install Low-Voltage Landscape Lighting
Transformer sizing, line voltage drop math, trenching, and waterproof hub wiring that prevents dim end-runs.
Pre-flight briefing
Read this before you buy a single fixture
Overview
Design and install a commercial-grade 12V low-voltage LED landscape lighting system. Learn proper transformer load calculations, heavy-gauge cable sizing to eliminate voltage drop, clean slice trenching through established turf, and water-tight direct-burial hub connections that eliminate corroded wire nuts.
Estimated time
6–10 Hours (Single-Day Project: Morning Layout & Sizing, Midday Trenching, Afternoon Fixture Setting & Hub Splices, Evening Dusk Aiming/Balancing).
Add roughly 25 percent for a first attempt and a yard with awkward access.
Contractor pro-tip
Always install solid cast-brass or heavy bronze alloy fixtures over cheap stamped aluminum or composite plastic. Aluminum fixtures corrode and pit within two seasons from lawn fertilizers and irrigation sprinklers, while cast brass develops a protective natural patina that lasts decades.
Tools checklist
- Flat-edge spade or trenching shovel for slitting turf
- Wire stripper/crimper rated for 10-16 AWG stranded wire
- Digital multimeter (AC/DC voltage measurement)
- Small torpedo level for setting fixture stems plumb
- Micro butane torch or heat gun for waterproof shrink tubing
- Heavy-duty wire cutting pliers
- Marking flags & 100-foot measuring tape
- Cordless drill and masonry bits (if mounting to brick/concrete)
Materials checklist
- Multi-tap commercial low-voltage transformer (12V-15V taps, sized to 125% of load)
- 12/2 AWG direct-burial low-voltage landscape lighting cable (pure copper)
- Solid cast brass directional bullet spotlights (warm white 2700K-3000K)
- Solid cast brass heavy-stem pathway hat fixtures
- Direct-burial silicone-filled waterproof wire nuts (King Innovation or equal)
- Adhesive-lined marine-grade polyolefin heat-shrink tubing
- 1/2" Schedule 40 PVC conduit for sleeves under walkways and root zones
Safety first — applies to the whole build
- Call 811 to locate underground utility, gas, and communications cables before slicing lawn trenches.
- Always plug your multi-tap transformer into a code-compliant outdoor GFCI outlet protected by an in-use weatherproof cover (bubble cover).
- Never exceed 80% of your transformer's rated wattage capacity to prevent internal coil overheating and breaker trips.
The build
Step by step
6 steps · 6–10 Hours (Single-Day Project: Morning Layout & Sizing, Midday Trenching, Afternoon Fixture Setting & Hub Splices, Evening Dusk Aiming/Balancing).
- 1
System Layout, Wattage Sizing, and Cable Run Planning
Morning (Planning & Sizing)Call 811 before digging to mark all buried utilities. Walk your property at dusk to identify architectural focal points: stone pillars, specimen trees, textured masonry facade, and walkway trip hazards. Measure cable runs from your outdoor GFCI outlet. Calculate your total system load by summing each fixture's LED wattage, then apply the 80% Rule: your total load must never exceed 80% of the transformer's rated capacity (e.g., a 150W transformer should carry a maximum of 120W of fixtures). Size your cable according to total run length: use 12/2 AWG for runs up to 100 feet carrying under 100W, or 10/2 AWG for runs between 100 and 175 feet. Plan your topology using a "Hub" or "T-Method" layout—running one heavy feeder cable from the transformer to a central splice point, then branching out—rather than stringing fixtures in a single continuous daisy chain.
The costly mistake
Daisy-chaining 10+ lights sequentially along a single 100-foot 14-gauge run causes severe voltage drop. The first light receives 12.5 volts while the last fixture starves at under 10.5 volts, causing flickering, color temperature shifts, and premature LED driver failure.
- 2
Transformer Mounting, Conduit Sleeve, and GFCI Testing
Late MorningMount your stainless-steel transformer to an exterior wall, deck post, or outbuilding at least 12 to 18 inches above the finished ground grade to protect it from splashing mulch and snow accumulation. Test your GFCI receptacle using a dedicated circuit tester to verify ground integrity. Cut a length of 1/2-inch rigid Schedule 40 PVC conduit to sleeve the primary 12/2 low-voltage cable from the bottom terminal knock-outs of the transformer down 6 inches below ground level. This rigid sleeve protects vulnerable cable from line trimmers, edgers, and rodents right at ground contact. Strip 3/4 inch of outer insulation from the 12/2 main cable leads, insert one conductor into the Common (COM) terminal lug and the other into the 12V low-voltage tap, and tighten the lugs securely.
The costly mistake
Never leave exposed direct-burial wire running down the bare siding into the dirt without a PVC conduit sleeve. String trimmers and commercial edgers cut right through low-voltage insulation, causing hidden grounding shorts that trip the transformer circuit breaker.
- 3
Trenching the Feed Lines Using the Slice & Hinge Method
Early AfternoonLow-voltage landscape cable requires a minimum burial depth of 6 inches under standard residential code (NEC). To preserve your turf and avoid extensive lawn repair, use the "Slice and Hinge" technique: drive a flat-edge spade straight into the sod at a 45-degree angle along your layout line, gently levering the handle backward to pry open a 6-inch V-shaped seam in the root layer without severing the grass carpet. Tuck your direct-burial cable down into the bottom of the slit using a wooden block or blunt lath strip—never press cable down with the sharp blade of your shovel, which slices insulation. In mulch beds, simply rake back the mulch, cut a narrow 6-inch trench through topsoil, drop the cable, and backfill.
The costly mistake
Digging wide open trenches across an established lawn destroys root systems and leaves sunken, dying dirt tracks that take months to recover. Slicing and pressing maintains root continuity so the turf knits back together seamlessly after watering.
- 4
Setting Stakes, Plumb Alignment, and Cable Service Loops
Mid AfternoonDrive heavy-duty 8-inch threaded ground stakes vertically into undisturbed soil at each fixture location. Use a torpedo level to ensure each mounting stake is plumb in both directions before threading the fixture stem. Thread your cast-brass path lights or directional spotlights onto the stakes until snug, but leave room for micro-adjustments. When pulling your lead wire up to the fixture, always leave an 18-inch to 24-inch slack loop of cable coiled and buried beneath each fixture. This "service loop" allows you to relocate lights as shrubs grow, pull fixtures out to service seals, or make grade adjustments without slicing open the main underground feed line.
The costly mistake
Pulling your cable bone-tight between fixtures with zero slack guarantees disaster. As soil naturally settles or shrubs mature over two to three years, physical tension pulls fixtures crooked, shears wire nuts apart underground, or snaps fixture mounting collars.
- 5
Direct-Burial Waterproof Connections and Hub Splices
Late AfternoonStrip 5/8 inch of insulation from your conductors using automatic wire strippers, taking care not to nick individual copper strands. Use pre-filled, silicone-injected waterproof wire nuts rated explicitly for direct-burial (such as King Innovation DryConn) or direct-burial compression screw hubs. Twist conductors clockwise until tight, allowing silicone sealant to envelop the wire collar completely. For maximum long-term reliability in high-moisture clay or irrigated zones, slide a section of marine-grade, adhesive-lined heat shrink tubing over each finished wire nut connection and activate it with a heat gun until waterproof inner adhesive oozes from both ends.
Safety alert
Critical Waterproofing Standard — Never use standard indoor plastic twist wire nuts or regular electrical tape underground. Subsurface soil moisture and lawn chemicals penetrate standard tape within weeks, causing electrolytic copper corrosion, high electrical resistance, scorched connections, and complete circuit failure.
- 6
Nighttime Field Balancing, Multimeter Testing, and Aiming
Dusk / EveningTurn on the system at full dark to evaluate sightlines and balance light distribution. Place your digital multimeter probes across the terminal leads of the furthest fixture on your longest run to check operating voltage under live load. High-quality 12V LED drivers operate reliably between 10.8V and 12.5V; if your furthest light drops below 11.0V, shift that run's feeder wire to the transformer's 13V, 14V, or 15V multi-tap terminal to compensate for line loss. Walk your driveway, sidewalks, and patio seating areas to ensure directional spotlights highlight trees and facades without creating direct eye glare for visitors. Shield path light caps so the light source remains hidden and only illuminates the walking surface below.
The costly mistake
Aiming bright bullet spotlights directly toward the street or patio seating causes harsh blinding glare. Always angle uplights toward solid architectural surfaces or tree canopies, cross-aiming two softer fixtures rather than blasting one overpowered light directly into an observer's line of sight.
Contractor Referral Network
Decided this build is more than you want to tackle?
Sizing a transformer, calculating voltage drop, and making code-compliant waterproof splices takes specialty tools and a careful hand. If you’d prefer to hand the wiring, trenching, and warranty to a vetted local crew, get free, no-obligation estimates from licensed landscape lighting contractors in your area.
Free estimates • Zero obligation
Tools & hardware
Need additional equipment?
Explore our complete inventory of commercial mowers, trimmers, compactors, and hauling rigs.